
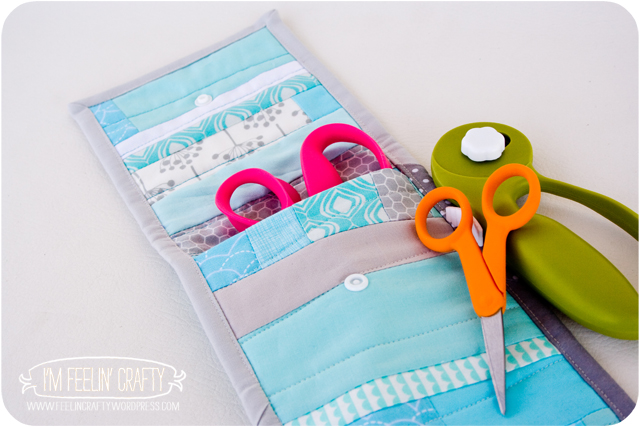
I recently made this pouch as a pouch for pinking shears. Then the other day I bought a pencil box for my son. As we were walking out of the store, I was struck by a moment of confusion…. Um, why did I just buy that when I could make one, super fast and for the same price (if not less, since this only uses scraps)???? No clue! I just kept on walking….
So not only can this be a pinking shears pouch, but it can be an eyeglass case, a marker pouch, a credit card holder, a cash holder…. Basically anything you want to hold…. Ok, maybe not ANYTHING, like it probably wouldn’t work for a puppy. You’d need something else for that. But for small things, this will work!
Ready? It’s simple!

Materials:
Scraps!
a small piece of batting
Cutting devices
Thread
Snap (or you could use buttons or magnets)
 Step 1: Sew the scraps together. But, before you can start sewing you need to determine the size you need! For my pinking shears I decided that the pouch needed to by 11 inches wide. That’s about 5 ” for the front and back, plus your seam allowances. Then the shears are about 10 inches tall, so the pouch needed to be 20″ plus the flap, which I made 5″. So for this pouch I needed a pieced piece 11″ x 25″. Once you figure the size you need, just start sewing those scraps together!
 Step 2: Trim your piece to the exactly dimensions that you need.
 Step 3: Fold the piece in half.
 Step 4: Sew together one end, right sides together. It’s hard to see in this picture, but I really did sew the end together there along the line I drew! Then turn it back, wrong sides together.

Step 5: Trim the batting to the same length and width of your folded piece.
 Step 6: Insert the batting between the folded pieces.

Step 7: Quilt the pieces together!

Step 8: Cut the binding. 2.5 inches by the perimeter of your pouch. Mine was 5.5 + 10 + 5 + 5.5 + 10 + 5 = 41 inches, plus extra.

Step 9. Fold over the pouch so that the sewn end is the exposed end under the flap. Sew on the binding.
 Step 10: Add the snap.

Step 11: Add the pinking shears! You’re done!
 What would you use your for???